How to Install and Run Gremlin on Windows

Introduction
This tutorial provides a walkthrough for installing Gremlin on Windows Server 2019 and performing a Chaos Engineering experiment using a Gremlin CPU attack. The same process can be followed for all supported Windows versions and attack types.
Prerequisites
Before you begin this tutorial you need the following:
- A Windows Server 2019 host
- A Gremlin account (Sign up here)
Step 1 - Installing Gremlin
In this step you'll install Gremlin
Running the installer
- Download the Gremlin installer
gremlin_installer.msi - Run the installer by double-clicking on the downloaded file.
- Windows, by default, prevents this from running, and shows a Windows protected your PC dialog box.
- Proceed with the installation by clicking on More info. This will display another button at the bottom, Run anyway. Click that button to continue.
- The Gremlin agent installer may start behind other windows. Please minimize them to see the installer window.
- A dialog box asking to escalate privileges may be displayed. Click Yes.
- When agent installer is displayed click Next, Next, Install, Finish.
- At this point, the Windows agent is installed, but not yet configured. Continue to the next section.
Authentication
Gremlin has two forms of authentication for Gremlin clients. Make sure you review the authentication section to figure out which method works for you.
Configuring the Gremlin service
Before you start the gremlin service, you must set some configuration variables. Gremlin recommends using one of the following two methods:
- config file Write all your configuration to a file read by Gremlin
- init command Tell Gremlin what configuration to use from the command prompt (secret auth only)
Configuration File
Gremlin's configuration file on Windows is located at C:\ProgramData\Gremlin\Agent\config.yaml. Please note that ProgramData is a hidden folder. You can either type in the address on File Explorer or show hidden folders then navigate interactively.
In your installation, you will see an example of this file at C:\ProgramData\Gremlin\Agent\config.yaml.example copy this file or remove to the .example suffix, and fill in the file with your desired configuration. See the set of acceptable variables as well as an example on the configuration page.
Example
1# C:\ProgramData\Gremlin\Agent\config.yaml2team_id: 11111111-1111-1111-1111-1111111111113team_certificate: file://C:\ProgramData\Gremlin\Agent\cert.pem4team_private_key: file://C:\ProgramData\Gremlin\Agent\key.pem
Global Environment Variables
Alternatively, if you do not wish to use the configuration file or the init command, you can set up global system environment variables for the Gremlin service to read. See the full list of environment variables.
Init Command
Open a command prompt and run gremlin init. You will be prompted to enter the following values.
- Please input your Team ID:
- Please input your Team Secret:
Alternatively, you can set up your shell to include these as environment variables to bypass the prompts.
Starting, Stopping, and Restarting the Gremlin service
The last step is to restart the Gremlin Service.
Press Ctrl then Esc to display the Start Menu
Start typing services
When Services is selected press Enter or click it
Navigate to the Gremlin Daemon entry.
Right click on it, and click Retart
- It can take up to 40 seconds for the service to start. The progress dialog box automatically closes when the Gremlin Daemon is ready.
Alternatively, you can restart the Gremlin Service from the command line (as Administrator):
1net stop gremlind2net start gremlind
The host is ready to be attacked and will be available on your dashboard!
Step 2 - Running an attack on Gremlin
As with attacks on Linux, Windows attacks also have parameters YOU control to give you flexibility in your experimentation, from light to severe impacts. For this article, we will perform a CPU attack. Setting up and executing the other attacks are similar to this.
A CPU attack is designed to consume CPU resources for an amount of time you set and at the level you set. We will use the defaults.
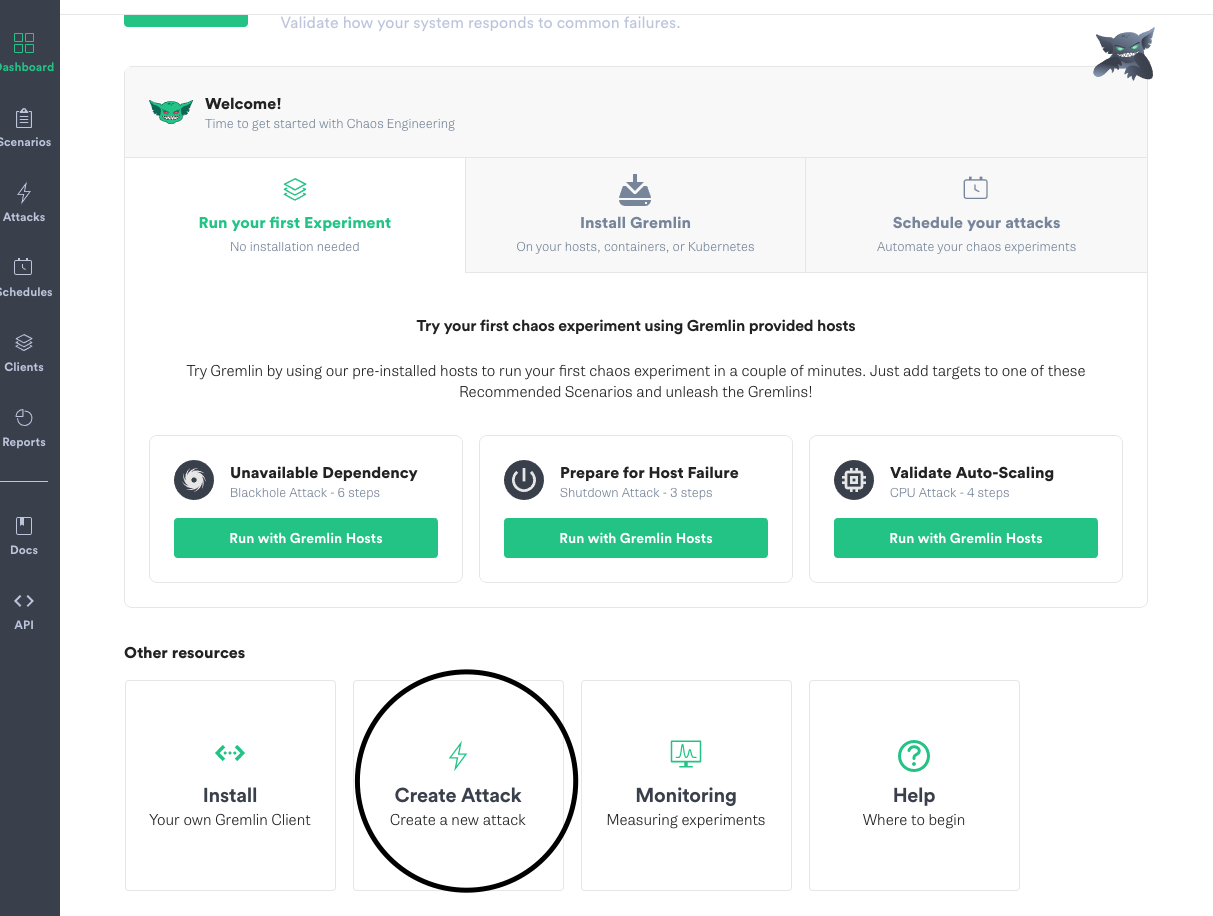
In the Gremlin dashboard (after you login to https://app.gremlin.com), select Create Attack.

Select the Windows host you created and registered as the target for this attack.

In the Choose a Gremlin section, you can select which type of attack you want to run. For this test, select CPU. Adjust the settings are you like.
Notice the red Halt All Attacks button, which stops any running attack and reverts things back to their previous state. This is especially useful if you encounter problems with overly aggressive experiments.

The selection in the above example will consume 75% of the CPU on one core for 60 seconds.
Click on "Unleash Gremlin"

You can watch in the Gremlin UI as the attack runs, and can also see the CPU attack details in the Task Manager on the Windows host.
Summary
Congratulations, you just ran your first chaos experiment on Windows!
Feel free to run the experiment many times, varying parameters and seeing how that impacts your instance. Next steps could be to add a full monitoring solution to the instance for better data or perhaps installing the Gremlin CLI and daemon to a different server that you already own and operate (we recommend doing that with a non-production, non-vital server at this stage, should you go this route). You are also welcome to run the other attack types available for Windows, and also set up and run Scenarios on your hosts.
Best wishes and have fun unleashing the Gremlins!
Related


Avoid downtime. Use Gremlin to turn failure into resilience.
Gremlin empowers you to proactively root out failure before it causes downtime. See how you can harness chaos to build resilient systems by requesting a demo of Gremlin.
Get started